How to Show Library Dependency Tree in Android Studio?
Different ways to show library dependencies used by your app in Android Studio using gradlew command.
One of the things I struggle in Android development is to understand the dependencies' relationship among all the libraries that I use. Sometimes, if you don't include certain library dependency, and it still works? Why? It is because of the implicit dependency that has been included by other libraries that you use.
In this article, I'm going to show the different ways of showing or displaying library dependencies in Android Studio.
1. Gradle Tool Windows
- Go to View -> Tool Windows -> Gradle or click the Gradle tab in the top right corner of your Android Studio
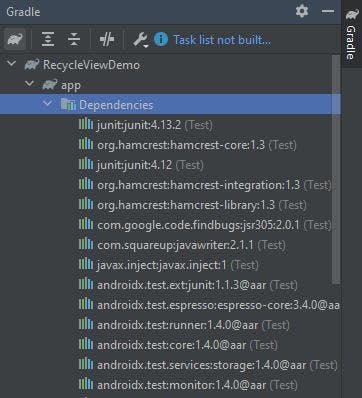
The problem with this method is it doesn't show the dependencies tree. All dependencies are flattened, which makes it a bit harder to figure out certain library relationships.
2. Command-line Dependency Tree
- In the terminal window, run the following command
gradlew -q app:dependencies --configuration debugRuntimeClasspath-qis used so that it has the clean output (no logging information printed)--configurationis used to show only certain configuration dependencies. If this is omitted, all configurations' dependency will be included which we don't want
This the command-line output:
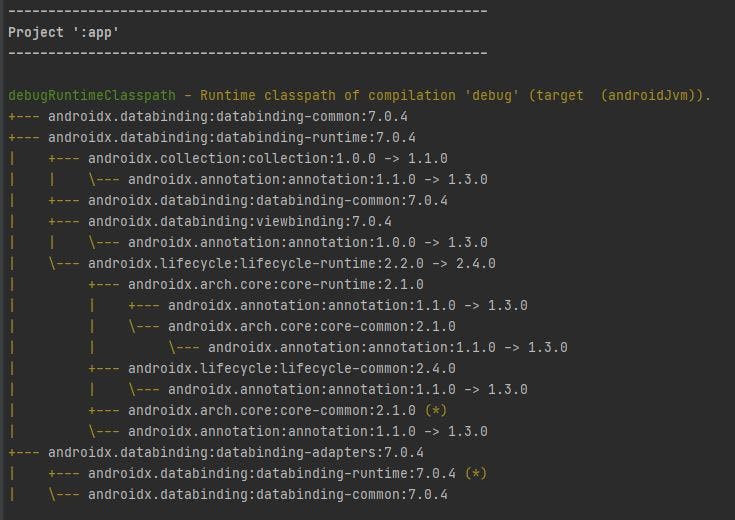
Tip 1: If you failed to run the command above, you may need to update the
JAVA_HOMEenvironment variable to the correct JDK path (i.e.<Androud Studio Installed Path>\jre). Changing it from Settings->Build, Excecution, Deployment->Build Tools -> Gradle in Android studio doesn't seem to work.Tip 2: if you failed again due to the following error
gradlew : The term 'gradlew' is not recognized as the name of a cmdlet, function, script file, or operable program. You need to specify the ".\" in front of thegradlewcommand..\gradlew -q app:dependencies --configuration debugRuntimeClasspath
3. Web-based Dependency Tree Report
In the terminal window, run the following command
gradlew app:dependencies --configuration debugRuntimeClasspath --scan--scanis added at the end and-qis removed from the previous command.-qremoval is required in order to work correctly
When you see this, type yes and click enter.
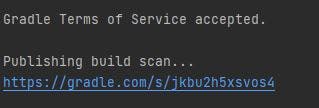
Publishing a build scan to scans.gradle.com requires accepting the Gradle Terms of Service defined at https://gradle.com/terms-of-service. Do you accept these terms? [yes, no]- Click the link below the Publishing build scan...
- Enter your email address
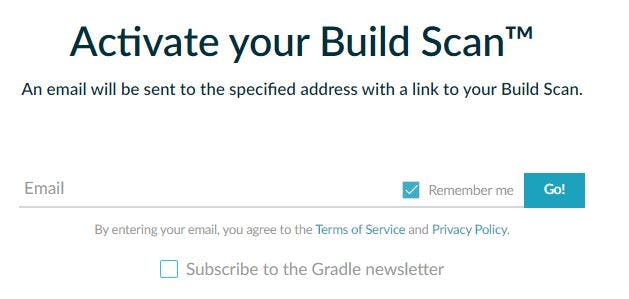
- Click this link as shown below once you receive the email

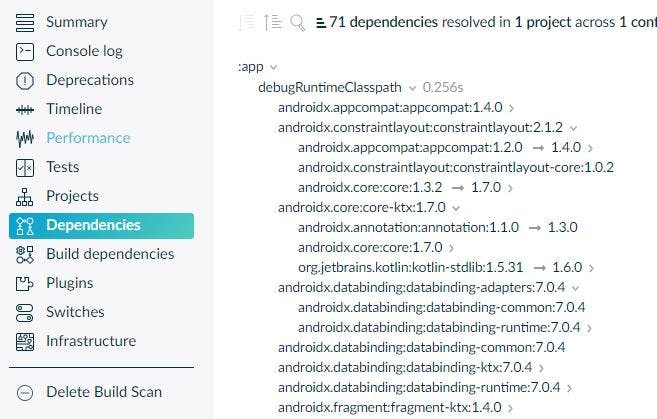
Now, you can view the web-based dependency tree report!
4. Local HTML - Project Report Plugin
Another web-based dependency tree way is to use project report plugin.
- Add project-report plugin in your
build.gradle(module/app level) and syncplugins { ... id 'project-report' } - In the terminal window, run the following command
gradlew htmlDependencyReport - Open the .\app\build\reports\project\dependencies\index.xml
- Search file debugRuntimeClasspath
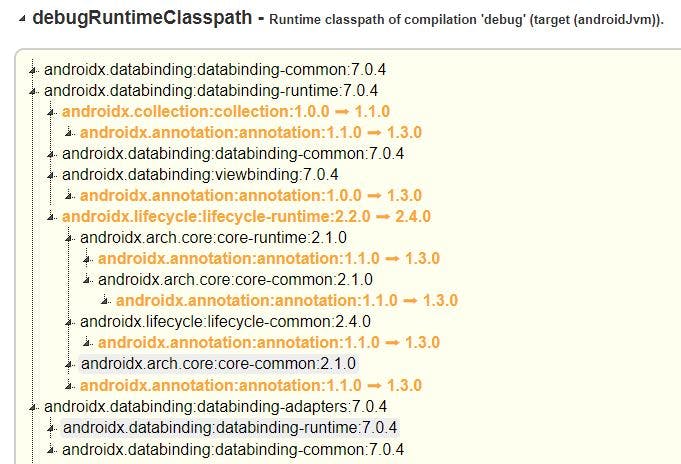
The web-based output looks like this:
Conclusion
Although the web-based dependency tree is user-friendly, method 2 - Command-line Dependency Tree is sufficient for me most of the time because it is quick!