How to Add Deep Links in Jetpack Compose?
Step-by-step and easy-to-follow guide to implement deep links in your Android app using Navigation Compose library

I'm a self-taught hobbyist Android developer who loves to build projects and share valuable tips for new Android developers.
Feel free to comment, share or connect with me!
This is part of the Jetpack Compose navigation series:
Part 5 - How to Add Deep Links in Jetpack Compose?
A deep link is a hyperlink that takes you directly to a certain screen on your app.
For example, clicking on my blog's URL, the Android OS shows a list of apps that can be used to open the URL as you can see below.
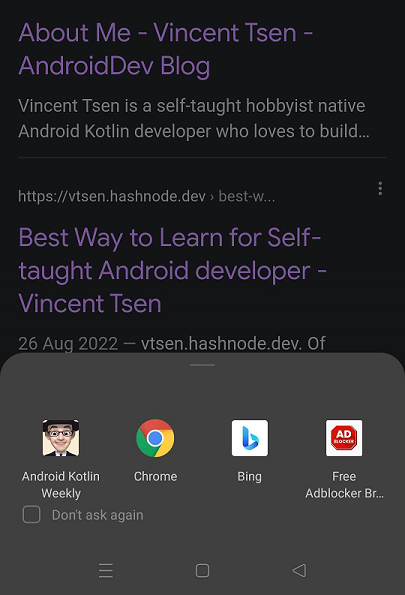
Note: The UI above may look a bit different on different Android OS
Since my blog's app supports deep links, it shows up as one of the apps, the first one from the left. If I open it with my blog's app, it takes me to specify screen content within my app. That's the called deep link.
To demonstrate how to implement the deep link, I use this simple Jetpack Compose navigation as an example. Let's add the deep link.
Overview
The example app has 4 screens:
Login Screen
Home Screen
Profile Screen
Search Screen
I'm going to add the deep link for each screen in this example app.
1. Add hostname in the activity's intent filter
In AndroidManifest.xml, add the <data>, <category> and <action> tags in the activity's intent filter as shown below.
<manifest xmlns:android="http://schemas.android.com/apk/res/android">
...
    <activity
        ...
        <intent-filter>
            <data android:host="vinchamp77.github.io"
                android:scheme="https" />
            <category android:name="android.intent.category.DEFAULT" />
            <category android:name="android.intent.category.BROWSABLE" />
            <action android:name="android.intent.action.VIEW" />
        </intent-filter>

    </activity>
...
</manifest>
Note: Hostname is case-sensitive and needs to be lowercase characters.
2. Add NavDeepLink in NavGraphBuilder.composable()
The following code in NavGraph.kt needs to be updated by adding the deepLinks parameter when calling the NavGraphBuilder.composable().
// Login Screen
navGraphBuilder.composable(
    route = NavRoute.Login.path,
    deepLinks = listOf (
        navDeepLink {
            uriPattern = "https://vinchamp77.github.io/deeplink/login"
            action = Intent.ACTION_VIEW
        }
    ),
) {
    /*...*/
}

// Home Screen
navGraphBuilder.composable(
    route = NavRoute.Home.path,
    deepLinks = listOf (
        navDeepLink {
            uriPattern = "https://vinchamp77.github.io/deeplink/home"
            action = Intent.ACTION_VIEW
        }
    ),
) {
    /*...*/
}

// Profile Screen
navGraphBuilder.composable(
    route = NavRoute.Profile.withArgsFormat(NavRoute.Profile.id, NavRoute.Profile.showDetails),
    deepLinks = listOf (
        navDeepLink {
            uriPattern = "https://vinchamp77.github.io/deeplink/profile?id={id}&showDetails={showDetails}"
            action = Intent.ACTION_VIEW
        }
    ),
    /*...*/
) {
    /*...*/

}

// Search Screen
navGraphBuilder.composable(
    route = NavRoute.Search.withArgsFormat(NavRoute.Search.query),
    deepLinks = listOf (
        navDeepLink {
            uriPattern = "https://vinchamp77.github.io/deeplink/search?query={query}"
            action = Intent.ACTION_VIEW
        }
    ),
    /*...*/
) {
    /*...*/
}
You build the list of NavDeepLink using navDeepLink() helper function by specifying the uriPattern and the action parameters.
URI pattern without any argument is straightforward, no big deal. However, when the URI pattern has arguments, it must follow the standard URL query parameters format.
It took me a while to figure this out. For example, the following URI pattern won't work.
uriPattern = "https://vinchamp77.github.io/deeplink/search/{query}"
It works only if you have one deep link defined. If there is more than one deep link, it falls back to the first deep link that you defined.
So it must be in this format.
uriPattern = "https://vinchamp77.github.io/deeplink/search?query={query}"
3. Test the Deep Link
The easiest way to test the deep link is to use the Tools -> App LInks Assistant in Android Studio.
Go to step 4 - Test on device or emulator directly.
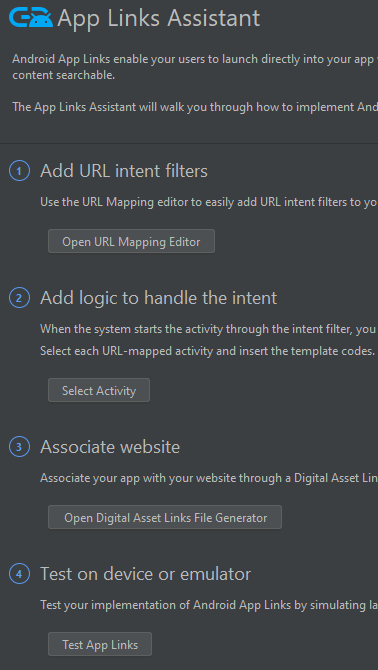
Then, add the URL that you would like to test and click Run Test.

Note: These are equivalent adb commands.
$ adb shell setprop log.tag.AppIndexApi VERBOSE
$ adb shell am start -a android.intent.action.VIEW -c android.intent.category.BROWSABLE -d 'https://vinchamp77.github.io/deeplink/search?query="liang moi"'
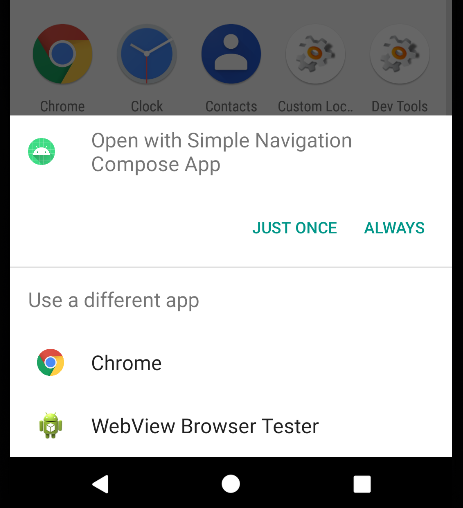
Click JUST ONCE or ALWAYS to open with Simple Navigation Compose App.
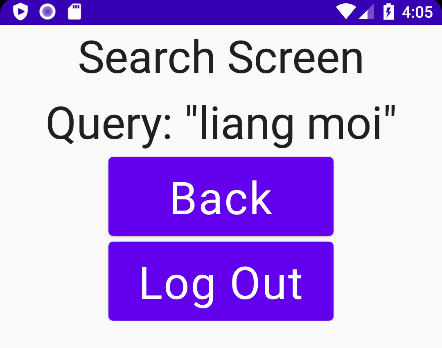
The search screen is shown with the search query that we passed in from the URL.
You're not done! Deep links are finally implemented for your app.
4. Verify Deep Link Host Name
Well, not really. If you run this app on Android 12 (API level 31). The link doesn't take you to the app at all. It requires you to verify the deep links' hostname belongs to your app.
To do that, you first need to generate a Digital Asset Links file and upload it to your as specify location on your website.
- <your hostname>/.well-know/assetlinks.json
Now, proceed to step 3 - Associate website in the App Links Assistant
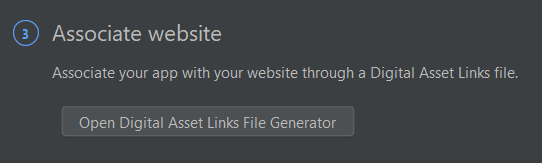
A lot of info should be already pre-filled for you. Select Signing config -> Debug, and click Generate Digital Asset Links File.
For a production build, select Select keystore file instead
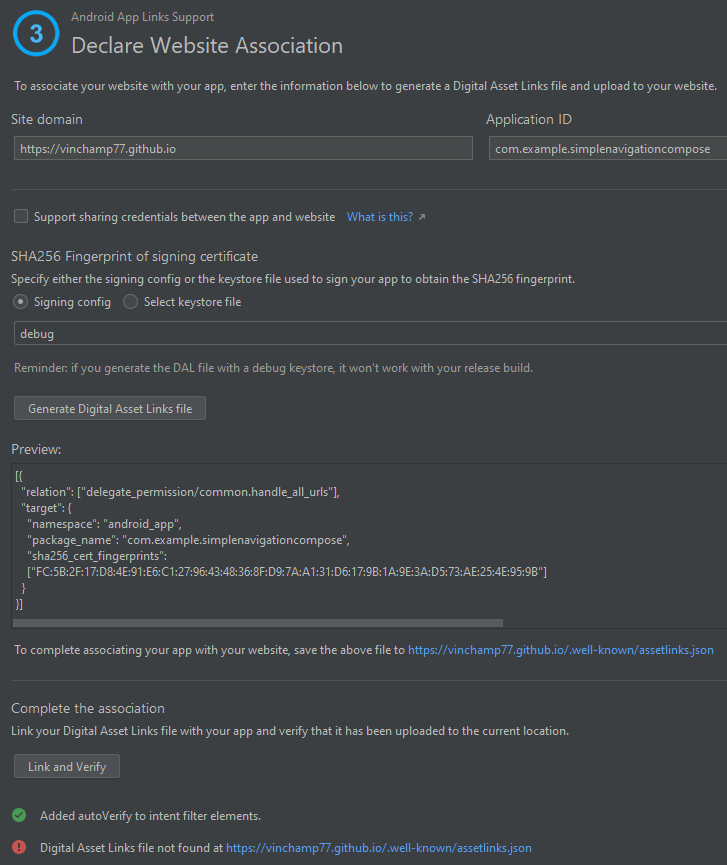
Once the file is generated, you can click Save file to download the file. You need to copy the file to your website. In this example, the file location is
If you are using a <username>.github.io page like mine, there are some things you need to be aware of for the .well-known folder to be recognized.
Method 1 - If you have _config.yml, you need to add the include: [".well-known"]. This is an example of my github page's _config.yml.
theme: jekyll-theme-minimal
title: Vincent Tsen
description: Self-taught Hobbyist Native Android Kotlin Developer
include: [".well-known"]
Method 2 - If you don't have _config.yml, you add .nojekyll in your root directory**.** The .nojekyII is just an empty file without any content.
Click Link and Verify and you should see
Success! Your app is associated with the selected domain(s).

The Android Studio also automatically added the autoVerify to the intent filter elements.
<intent-filter android:autoVerify="true">
    <data android:host="vinchamp77.github.io"
        android:scheme="https" />
    <category android:name="android.intent.category.DEFAULT" />
    <category android:name="android.intent.category.BROWSABLE" />
    <action android:name="android.intent.action.VIEW" />
</intent-filter>
Try to test the app link in step 3 above on Android 12 (API level 31) and above, it works!
You may also notice that it doesn't prompt you to choose from a list of apps, but instead takes you directly to your app. This is also the benefit of verifying your hostname.
Summary
Deep link is quite useful because it brings you directly to a specific screen. One thing I noticed is if the URL doesn't match any of the URL patterns, it falls back to the first deep link. For example, the first deep link in this example is the login screen. All the invalid URL brings you to the login screen directly.
Other than triggering a deep link from URL, you can also trigger the deep link from another app using PendingIntent. I will cover the PendingIntent topic later on. Enjoy!
Source Code
GitHub Repository: Demo_SimpleNavigationCompose (deep link branch)


